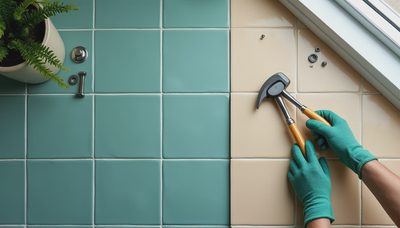
Choosing Kilz for ceiling paint is less about picking a familiar label and more about sequencing the work correctly. A ceiling can look finished at noon and reveal joint lines, water marks, or roller flashing when afternoon light crosses it. The product matters, but surface preparation, drying time, ventilation, and the order of nearby trades matter just as much. If it's not on the schedule, it's not happening.
Decide whether you need primer or ceiling paint
First, separate a primer problem from a finish-paint problem. New drywall, repaired joints, patched nail holes, and stained surfaces usually need primer before the final ceiling coating. Primer creates a more uniform surface so the finish does not soak into some areas and sit on top of others.
For ordinary, previously painted drywall, a dedicated ceiling paint may be enough if the existing coating is sound, clean, and free of stains. Kilz Original Interior Primer is an oil-based product commonly used for tough stains, but it has stronger odor and longer cleanup requirements than a water-based primer. Kilz 2 All-Purpose is a water-based option suited to many interior drywall and repair jobs. Kilz 3 Premium is another water-based choice when better coverage and stain resistance are needed.
Do not assume a primer alone is the finished surface. Most primers dry with a flatter, less uniform appearance than a purpose-made ceiling finish. Put the final paint on the schedule as a separate task, usually after the primer has dried according to the label.
Match the product to the ceiling condition
A practical product decision starts with the ceiling, not the store shelf.
- For new drywall or broad joint-compound repairs, use a water-based drywall primer, then apply two finish coats if the first coat shows uneven absorption.
- For isolated water marks, identify and repair the leak before painting. Once the ceiling is dry, use a stain-blocking primer on the affected area. Painting over an active leak only hides the evidence temporarily.
- For smoke, grease, or old discoloration, use a stain-blocking product suited to the contamination. Oil-based primer can block some difficult stains effectively, but plan ventilation and allow additional drying time.
- For a bathroom ceiling, select a finish intended for humid interior spaces and run the exhaust fan during and after the work. Primer does not correct poor ventilation.
Kilz for ceiling paint can be a useful search starting point, but read the exact product label before buying. A quart may cover a small repair, while a typical 12-by-12-foot room can require one gallon for primer and another gallon for finish coats, depending on texture and porosity. Budget roughly $25 to $45 per gallon for many primers and $30 to $60 for quality interior ceiling paint, with specialty stain blockers costing more.
Build the schedule before opening the can
Ceiling painting should happen after dusty drywall sanding, electrical rough-in, HVAC work, and major carpentry are complete. It should happen before installing delicate light fixtures, final trim touch-ups, or carpeting whenever possible.
A workable sequence looks like this:
- Day 1 morning: inspect the ceiling, repair cracks, remove loose paint, and protect floors and cabinets.
- Day 1 afternoon: sand repairs, vacuum dust, and wipe the surface with a slightly damp microfiber cloth.
- Day 2 morning: spot-prime repairs or roll a full primer coat. Keep the room between roughly 50 and 90 degrees Fahrenheit unless the label specifies a narrower range.
- Day 2 afternoon or Day 3: inspect under side lighting, sand raised fibers, and apply the first finish coat.
- Day 3: apply the second finish coat if coverage is inconsistent, then leave the room clear while the coating cures.
Climate changes the schedule. Portland moisture can extend drying time, while Phoenix dry heat can make a roller edge set before the next section is blended. In either case, follow the recoat time on the container rather than relying on the surface feeling dry.
Prep details that prevent visible failures
Turn off power to ceiling fixtures at the breaker before removing or masking them. Do not paint over loose caulk, peeling coating, dusty joint compound, or active mildew. For mildew, correct the moisture source and use appropriate cleaning and safety practices before coating.
Use a sanding pole with fine paper for broad repairs and a sanding sponge for edges. Vacuum the ceiling and corners instead of blowing dust across the room. If the old surface is glossy, lightly dull it so the new coating can bond. Protect smoke detectors from dust, but reinstall them promptly after the work is complete.
When using Kilz for ceiling paint on patched drywall, prime every repair rather than only the center of the compound. Feathered edges can absorb paint differently from the surrounding paper, creating a halo. A thin, even primer coat is better than one heavy pass that drips or dries unevenly.
Roll the ceiling as one continuous field
Use an extension pole and a roller nap appropriate to the surface. Smooth drywall often works well with a 3/8-inch nap; light texture may need 1/2 inch or more. Test a small area first because heavy nap can exaggerate texture and leave a stippled finish.
Work in sections roughly three to four feet wide. Keep a wet edge, reload the roller regularly, and finish each section with light, parallel passes in the same direction. Do not press harder as the roller empties. That creates thin spots and visible bands.
Start near the main light source and work away from it when possible. After the first coat dries, inspect from the doorway and with a bright work light held at a low angle. This catches flashing that normal room lighting hides. Kilz for ceiling paint may cover a repair well during the first pass, but uneven sheen can still require a second finish coat.
Coordinate the other trades
A ceiling is not complete until the trades stop damaging it. Tell the electrician when the surface will be painted and leave fixture boxes accessible. If an HVAC contractor still needs to cut registers or access ductwork, delay the final coat or keep matching paint available for repairs.
Install recessed-trim components, smoke detectors, and light fixtures after the ceiling has had adequate drying time. Have the flooring installer protect the finished surface if ceiling work must happen later. A $4 drop cloth is cheaper than a second ceiling coat, but it is not a substitute for scheduling.
Keep one labeled quart of leftover finish paint. Record the product name, sheen, color, room, and application date. Future patching is much easier when the can is identifiable instead of being one of five unmarked white containers in the garage.
Final inspection and post-mortem
Before releasing the room, check it in daylight and after the planned light fixtures are on. Look for roller lines, flashing, missed corners, drips, exposed joint tape, and stains returning through the coating. Mark defects with low-tack painter's tape and fix them together rather than making scattered touch-ups throughout the week.
The common failure is rushing from drywall sanding directly to finish paint. The second is buying a stain blocker without repairing the water source. The third is scheduling the ceiling before the last dusty trade. Kilz for ceiling paint can solve a coverage or stain problem, but it cannot solve a leaking roof, contaminated surface, or damaged drywall.
My closeout checklist is simple: leak repaired, surface dry, dust removed, primer selected, recoat time recorded, fixtures coordinated, and spare paint labeled. Kilz for ceiling paint belongs in that plan as a specified material with a delivery date, not as a last-minute store run. What ceiling condition and trade conflict are you trying to schedule on your project?