
A two way light switch diagram is useful when one ceiling light can be controlled from two locations, such as both ends of a hallway or at the top and bottom of a staircase. In US electrical terminology, this setup is usually called a three-way switch circuit. That naming difference creates avoidable ordering and scheduling problems during renovation: a homeowner buys two ordinary single-pole switches, the electrician finds a three-way circuit, and the drywall close-up date moves.
This is a planning guide, not a substitute for an electrician or local electrical code. Turn off the correct breaker, verify that power is absent with a properly rated tester, and do not work on wiring if you cannot positively identify every conductor. If the circuit is in an older home, has aluminum wiring, lacks a grounding conductor, or shows heat damage, stop and put a licensed electrician on the schedule.
Read the diagram before opening the wall
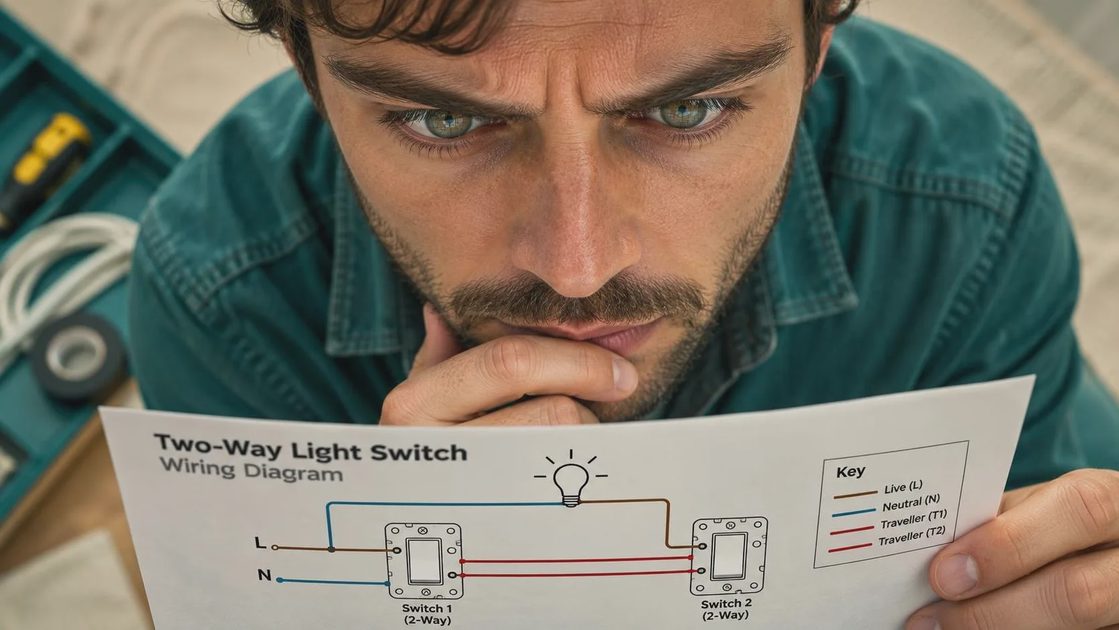
A typical two way light switch diagram shows two three-way switches connected by two traveler wires. Each switch has a common terminal and two traveler terminals. The line, or hot feed, enters the common terminal of one switch. The two travelers run between the switches. The common terminal on the second switch sends switched power to the light fixture. Neutral normally travels directly to the fixture rather than connecting to either switch, although the exact arrangement depends on how the circuit was originally installed.
The terminal layout matters more than the screw color alone. Many switches use a dark screw for the common terminal and brass screws for the travelers, but always read the manufacturer label. A green screw is for the equipment grounding conductor. Take a clear photograph before disconnecting anything, then label wires by terminal function rather than by position in the box. “Top wire” is not a reliable record when a box is rotated or rewired.
The diagram is also a coordination document. Before demolition, record which wall contains the incoming feed, which box sends power to the fixture, and whether the cable route crosses a future cabinet, blocking, or plumbing chase. If it is not on the schedule, it is not happening.
The US terminology problem
Search results for a two way light switch diagram often show diagrams from the United Kingdom, Australia, or other regions where “two-way” means control from two locations. In the United States, the matching hardware is generally two three-way switches. The circuit function is similar, but wire colors, cable conventions, and code requirements are not interchangeable across countries.
For a US renovation, use the terms “three-way switch,” “three-way circuit,” and “switch loop” when speaking with a supply counter or electrician. This reduces the chance of receiving a pair of ordinary single-pole switches. A single-pole switch has two current-carrying terminals and is intended for one control location. A three-way switch has three insulated circuit terminals, excluding ground, and is built for two control locations.
Do not rely on a generic online drawing if your existing box contains more cables than expected. A box with two cables may be a simple feed-through, while a box with three cables could feed another room, the light, or the second switch. Photograph the box, note cable counts, and send that information with your fixture and switch order. A five-minute record can save a return trip costing $100 to $250.
A practical pre-demolition checklist
Use the diagram as part of a short site checklist. First, identify the light controlled by the switches and test both switch positions. Second, locate the breaker and mark it clearly on the panel schedule. Third, verify the circuit is dead at both wall boxes and the ceiling box. Fourth, remove the cover plates and photograph every terminal before removing a conductor. Fifth, measure box depth and confirm whether the replacement switch and wire connectors will fit without crowding.
Then check the renovation sequence. Electrical rough-in should happen after framing changes are stable but before insulation and drywall. If a wall is being opened for plumbing, HVAC, or insulation, coordinate all trades before the electrician closes the box. A switch moved four inches to clear a new vanity can require a longer cable, a new box, patching, paint, and a revised trim date.
Plan for accessible junction boxes. A splice cannot be buried behind finished drywall simply because the original location is inconvenient. If a cable must be extended, the connection belongs in an approved electrical box with an accessible cover. Include box extensions, old-work or new-work boxes, approved connectors, faceplates, and matching switch heights in the procurement list.
Common diagram mistakes that cause rework
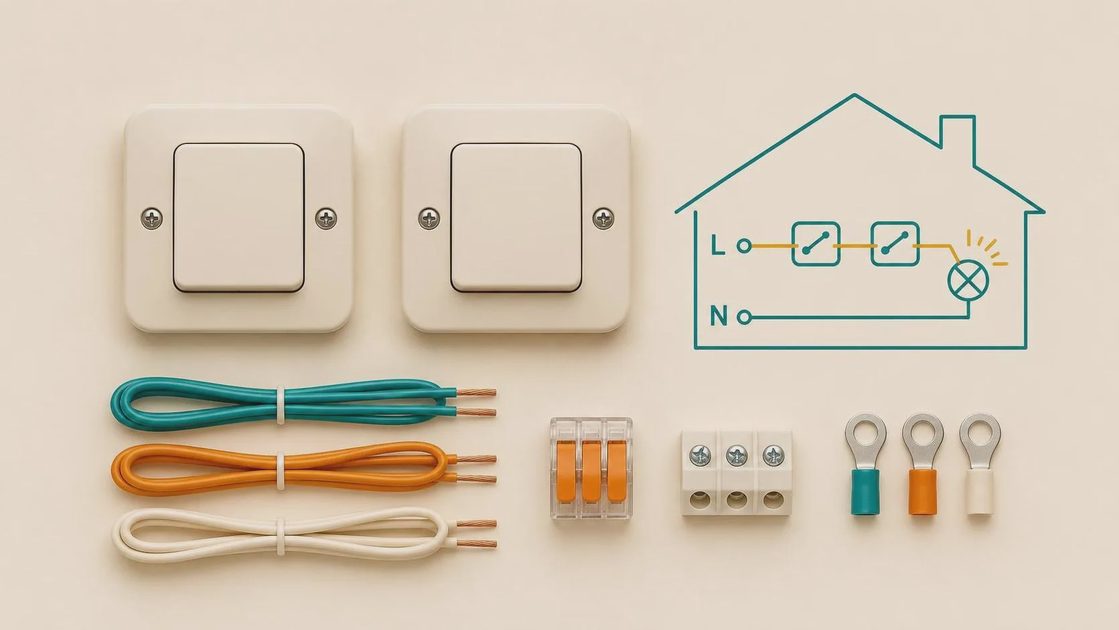
The most common mistake is treating both switches as identical terminal-for-terminal devices. They are functionally paired, but the common conductor belongs on the common terminal at each end. Swapping a common wire with a traveler can produce a switch that works only in certain combinations or fails to control the light correctly.
Another mistake is assuming the white wire is always neutral. In older switch-loop installations, a white conductor may have been used as an ungrounded conductor and should be identified according to applicable code. Never reconnect wires based only on insulation color. Existing installations can be nonstandard, damaged, or modified by several previous owners.
A third mistake is ignoring the neutral requirement of smart switches. Many smart three-way products need a neutral in the switch box, while some companion-switch systems do not. Before ordering a brand such as Lutron or Leviton, confirm the exact model, neutral requirement, load type, minimum wattage, companion device, and box depth. A $35 smart switch is not a bargain if it delays inspection or requires opening finished tile.
Scheduling the electrician and inspection
Give the electrician a complete package: the diagram, photographs, circuit description, switch model numbers, fixture specifications, and the renovation calendar. Ask for the planned rough-in date, the date boxes will be capped for drywall, and the date the switches and fixture will be installed. For a small room, rough wiring may take a few hours, but the calendar impact can be two or three days if the trade is booked out.
Keep the rough-in inspection before insulation or drywall where required by local authority. The inspector needs access to wiring, boxes, grounding, and cable protection. After the walls close, the final inspection and trim-out can follow. Do not cover an open electrical box to protect the schedule; that creates a concealed defect and a costly reopening later.
A useful handoff note says exactly what remains: “Two three-way switch boxes installed, travelers identified, fixture box secured, circuit labeled, rough inspection passed, trim switches stored in hallway cabinet.” That is better than “electrical mostly done,” which hides the item most likely to be forgotten.
Final testing before the wall closes
Before drywall, confirm that every box is firmly secured, cables are protected from screws and nails, grounding conductors are continuous, and box fill is adequate for the conductors and devices. Check that the fixture box is rated for the fixture weight. Photograph the open walls with a tape measure visible so future owners can locate cables safely.
After trim-out, test the light from every switch combination. The light should operate from either location regardless of the other switch’s position. Test any dimmer or smart control according to its instructions, and verify that the faceplate sits flat without forcing the device into the box. If a breaker trips, a switch becomes warm, there is a burning smell, or the light flickers, turn the circuit off and call an electrician.
Save the final two way light switch diagram, photographs, product manuals, and inspection record in the project folder. Label the folder with the room, circuit number, installation date, and installer. That small archive becomes valuable when the next renovation adds a built-in, changes a doorway, or introduces a smart-home system.
What does your existing box contain: one cable, two cables, or more than two? Post the photos, terminal labels, and planned rough-in date in your renovation schedule so the next trade conflict is visible before the wall closes.


