
A wiring diagram for single light switch work looks simple until it collides with drywall, inspections, old wiring, or another trade's schedule. A homeowner managing a renovation needs more than a drawing copied from a search result. You need to know what the diagram represents, what information the electrician needs, which materials must be ordered, and when the work can happen without forcing a second drywall visit.
This guide is about planning and coordination, not replacing a licensed electrician. Electrical work can cause shock, fire, or hidden damage when done incorrectly. If you are not qualified to work inside an electrical box, stop at documentation and scheduling. If it's not on the schedule, it's not happening.
What the diagram should show before work begins
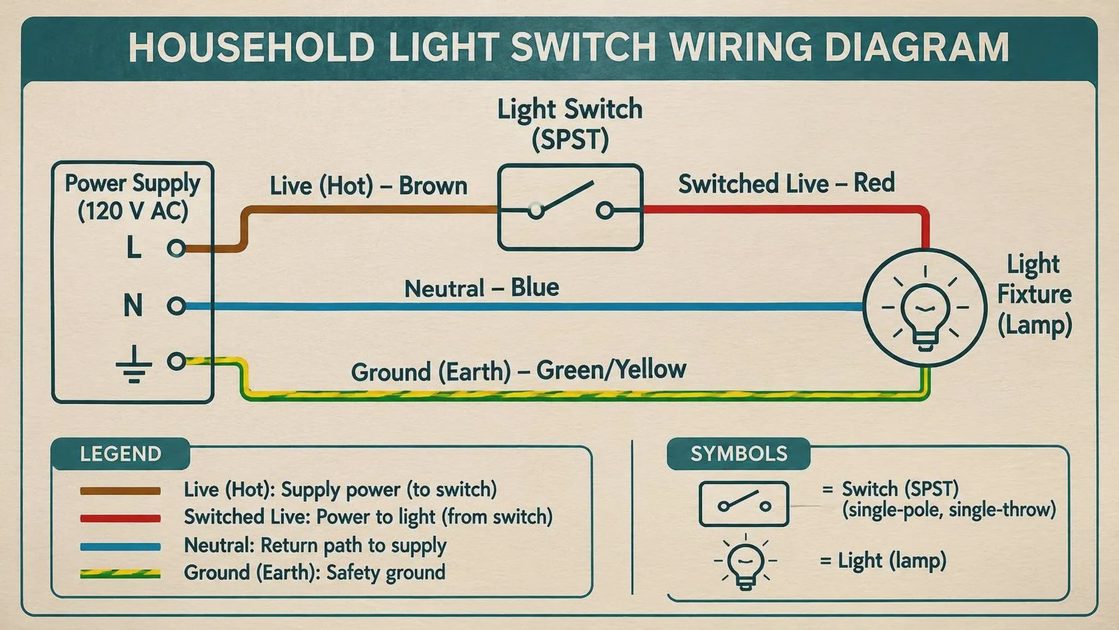
A useful wiring diagram for single light switch installation identifies the power source, switch box, light fixture, neutral conductor, grounding conductor, and cable path. It should also show whether power enters at the switch box or at the ceiling box. Those two layouts can look similar from the room but require different conductor arrangements.
Before ordering parts, record the circuit breaker number, breaker rating, cable type, box locations, and distance between the existing box and the planned fixture. Photograph the open boxes only after power has been shut off and verified with an appropriate tester. Do not rely on the breaker label alone; labels are often incomplete after years of remodeling.
Confirm whether the circuit already serves outlets, bathroom equipment, kitchen appliances, or exterior loads. A single light may be straightforward, but adding it to an overloaded or improperly protected circuit creates a larger correction list. In many jurisdictions, permits and inspections apply to new wiring or altered circuits. Put the permit question on the project schedule before demolition, not after the wall is closed.
Read the layout before opening the wall
A typical single-pole switch has two switched-current connections and a grounding connection. The neutral normally continues to the light fixture rather than attaching to a basic mechanical switch. Modern code requirements can also affect whether a neutral is required in the switch box, especially when a smart switch might be installed later.
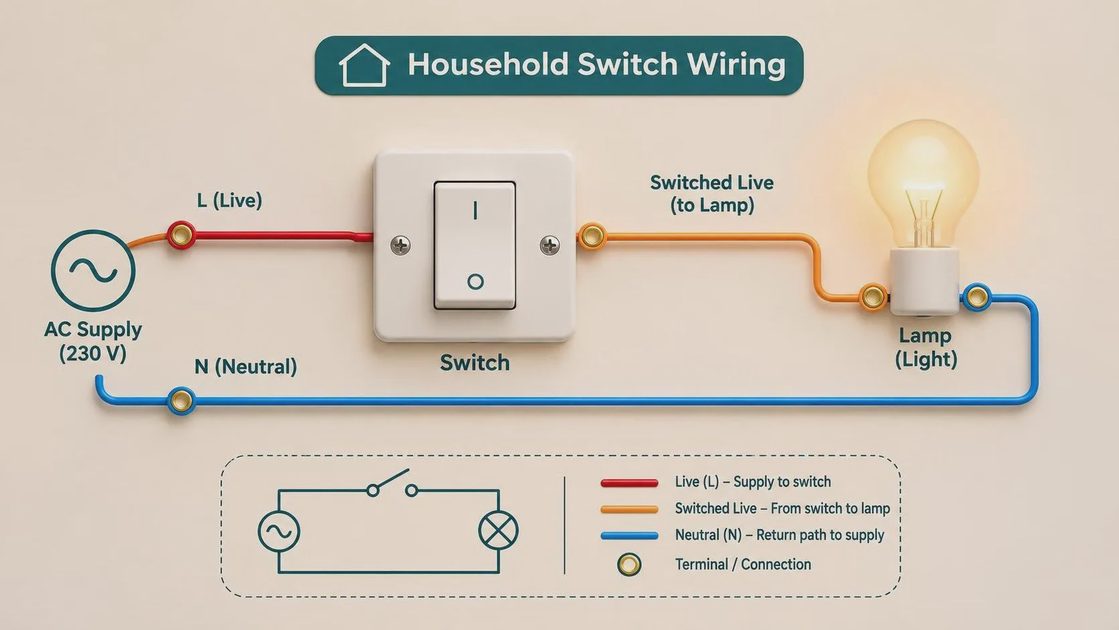
The phrase wiring diagram for single light switch can describe several arrangements, so do not assume every online illustration matches your house. In one common layout, incoming power reaches the switch box first. In another, power reaches the ceiling fixture first and a switch loop travels to the wall control. Older homes may contain cloth-insulated cable, aluminum branch wiring, missing grounds, or boxes that are too shallow for current devices.
Have the electrician mark each conductor by function before disconnection. Color is a useful clue, not proof. A white conductor may have been repurposed in an older switch loop, and a previous installer may have used nonstandard colors. The correct identification comes from testing and tracing, not from appearance.
Sequence the trade work around the switch
The cleanest schedule usually has the electrician visit after framing changes are complete but before insulation and drywall. At that rough-in visit, the electrician can install the cable, boxes, supports, and protective fittings while the wall cavities remain accessible. The fixture itself can often wait until painting and finished flooring are complete.
Order the light fixture at least one to three weeks ahead if it is a standard product, and allow four to eight weeks for a special-order fixture or replacement glass. Confirm the fixture weight, mounting method, canopy diameter, and required box support before the rough-in appointment. A heavy pendant that arrives after drywall may require opening the ceiling to install a different support box.
Keep the electrician's scope in writing. State the switch location, fixture location, circuit source, dimmer or standard switch requirement, box type, permit responsibility, and rough-in inspection date. A short scope prevents the common failure where the electrician installs a box at the architect's old location and the cabinet installer later blocks it.
Common failure points to catch early
A wiring diagram for single light switch work will not reveal every field condition. The wall may contain plumbing, a structural post, HVAC ductwork, or a previous abandoned cable. Use the framing walk-through to confirm the proposed route before anyone drills. In a finished basement, concrete and fire blocking can turn a ten-minute cable run into a half-day access problem.
Box fill is another frequent issue. A crowded box can make device installation difficult and may not comply with the applicable electrical code. The electrician should calculate conductor volume and choose a box with enough capacity. Do not solve a crowded box by forcing wires behind the switch.
Dimmer compatibility deserves a separate check. LED fixtures can flicker, buzz, or fail to turn fully off when paired with an incompatible dimmer. Record the fixture brand and model, then verify the dimmer's load range and LED compatibility before the electrician closes the box. A $25 to $60 compatible dimmer is cheaper than repainting around a replacement box.
A practical handoff checklist for the homeowner
Print the wiring diagram for single light switch reference and attach it to the room's renovation folder, but annotate it with actual site information. Write the circuit number, panel location, fixture model, switch height, wall finish, and photographs of the open framing. Mark any change from the original plan in red so the electrician is not working from an obsolete drawing.
The day before rough-in, clear stored materials from the work area, identify the nearest working outlet, and make sure the electrician can access the panel. Keep the drywall contractor off that wall until rough-in approval is complete. After installation, photograph the boxes before insulation covers them, save the permit paperwork, and record the inspection result in the schedule.
At trim-out, test the switch from the intended standing position, confirm the fixture is secure, and check that the wall plate sits flat. If a dimmer, smart control, or occupancy sensor is planned, test its operation before the painter returns. Small corrections are cheap while the tools are already on site and expensive after the room is declared finished.
The post-mortem that prevents a repeat visit
The most avoidable delay is ordering the fixture before confirming the electrical box and mounting hardware. The second is allowing drywall to proceed before the rough-in inspection. The third is treating a generic wiring diagram for single light switch as a site-specific plan when the existing wiring is decades old.
A reliable closeout includes the final diagram, circuit label, fixture instructions, permit record, inspection approval, and photographs behind the finished wall. Store those files with the renovation schedule rather than in a contractor text thread. When the next owner, electrician, or smart-home installer needs access, the evidence is available.
The project question to post for your renovation team is specific: does the planned switch box location, fixture support, circuit path, and inspection date all appear on the current schedule? If not, resolve that gap before the wall closes.


